Friday, December 30, 2022

Note for blog (Please read)

Dear reader,

Thank you for taking the time to read my Searching for a star/Rising star blog/production documentation.

For some reason my blog posts aren't extending past a certain point, so to view some of my other blog posts, please scroll to the bottom of the page and press 'older posts'


Thursday, December 29, 2022

Unreal file structure

This blog post is to demonstrate my file structure within unreal.

At university, we learned this is what we should do for our folder structure - in this case, we use T_ for textures, M_ for materials, SM_ for static meshes, NS_ for Niagara systems so on and so forth.

I would have sub divided all of these assets into subsections in order to generate a more easy navigable menu - even when things are named this way, it can be difficult to find where assets are without specifically searching for them.

Furthermore, When making material instances, in the case of my flickering lights for example, I did it so the prefix is MI_ to denote material instances - even though it wasn't a specific material instance like when you create a material instance by right clicking an asset - instead duplicating it to alter a different setting. In the case of the lighting, I needed to change time input values for the light to have different flickering effects per light. 

Contents origin folder

Material folder

Particle folder

Texture folder


Tuesday, December 27, 2022

Post presentation for portfolio

Here are examples of breakdowns for my portfolio - this is to help emphasise what I have done in the work, as well as get a different look to the work I have done.

For example, putting them in marmoset, to get them to look the best quality as possible. Furthermore, I thought adding a project watermark would be a good way to make it feel like this was for a game.


Friday, December 23, 2022

Level layout

To get the scene to look full, I took most of the scene meshes and duplicated it downwards, this was to flesh out the scene and give depth. Making sure to duplicate it numerous times in order to give the illusion of this rocket being real and life size.
I made sure to duplicate it as many times as I could within reason, without making the engine lag so if a player were to look down, they would just see the layers. As the top level is the only playable part of the scene, it wouldn't make sense to duplicate it more than a few times. Furthermore, the rocket itself isn't full finished, to save on rendering space and optimisation, it was best for me to cover up the bottom of the rocket with slight fog and darker colours with post process volume bits.
In addition, it would be difficult to see down the centre of the rocket due to the player collision. I wouldn't want the player to jump down and needlessly cause death - so this would be boxed off.

Level layers from high angle view

Level from out of bounds

Collision with clear boundaries around rocket


Unreal iterations

When putting my level together in unreal, I went through various stages of post processing/colour correcting.

The initial idea was to have the level looking relatively clean and new, but as time progressed, this transgressed into a 'horror theme' which aligns with the colour and lighting in the most recent iteration of the scene. After looking at feedback, you are able to visibly tell the difference in lighting quality.

First stage with overall yellow-green overtone

Second stage with extra red accents

Final stage with red bounce light and much more subtle colours (red light isn't as harsh as the second stage)


Thursday, December 22, 2022

Console: High poly - Low poly workflow example

Here is an example of one prop within my scene, the console.

The low poly asset consists of around 8k tris.

I wanted to make sure there was a lot of detail I could maintain on this console, so I added switches, buttons, knobs etc - which take up the same UV space, as these are such small parts of the console, it would help save the texturing, not only time to texture but also saving UV economy.

Console Low poly and UVs

Console High Poly

Console Texturing


Wednesday, December 21, 2022

Post process passes

After reaching out to friend and 3D artist James Mitchell (As of writing this) Is a senior 3D artist at Frontier - I reached out asking for advice and he said my lighting looked a bit flat and inconsistent. 

I went back to alter the lighting and post processing, here are examples of the passes I did based on the advice he gave.


James' feedback


First post process pass

Second post process pass

Final post process pass


Verticality

Even though my top layer of the silo is the playable area, I thought of adding a ladder to my scene to imply verticality.

It seemed impractical to have individuals run from one layer to the next by going in and out of the doors.

This would be the safest way, however, adding ladders to the scene adds to the 'don't look down' theme.


Water effects and water damage

Following this tutorial - https://www.youtube.com/watch?v=yNOF7a-qXX4

I transposed this same water drip method into an animated decal.

Exporting maps from substance designer to bring into the unreal material editor.

Furthermore, I duplicated a dirt decal I already had in the scene, but changed the colour and roughness values to be reflective, along with inputting a Fresnel function to add to the reflectivity.

Select pillar with water effect


Emissive for static lighting

Light with flickering attached to sine to give water damaged effect


Deferred decal with additional panner nodes for movement


Scene vertex painting

To add a bit more dimensionality to my scene, I wanted to vertex paint the walls.

To create more colour variation would add to the scene, creating more off-tone colours.

Here is an example of the vertex painting in unreal engine, along with additional parallax occlusion that I added.

0% vertex

100% vertex

Unreal material


Pipe texturing

In my scene, to go with more of a downturned horror atmosphere, I thought it would be a good idea, not only to add more shape language but to also add in dripping effects which affect lights within the scene.

When texturing this pipe I made sure to incorporate more roughness values to indicate a wet pipe.

Pipe UV

Pipe texturing


Laying out the scene in unreal

As I had prior composition ideas at the initial idea generation stage, it was relatively straight forward to drag and drop everything into place.

This is the finalised unreal scene, however, I will create more blog posts outlining other stuff I made within unreal engine.


Map texture

This is to disclose my use of 3rd party textures for the map.

It would take a long time to draw the map out, so I wanted to do it quick but also be authentic as possible.

This map texture is sourced from wikicommons - https://commons.wikimedia.org/wiki/File:World_Map_from_the_Atlas_of_the_USSR_published_in_1928.jpg


Tuesday, December 20, 2022

Decals

To maintain optimisation in my scene, I made sure most of my decal were either 512 or 1024. The texel density may be slightly off, however, a lot of these decals would be small within the scene.

Having opacity map on them when exporting from substance painter so I could use them for the intended purpose.

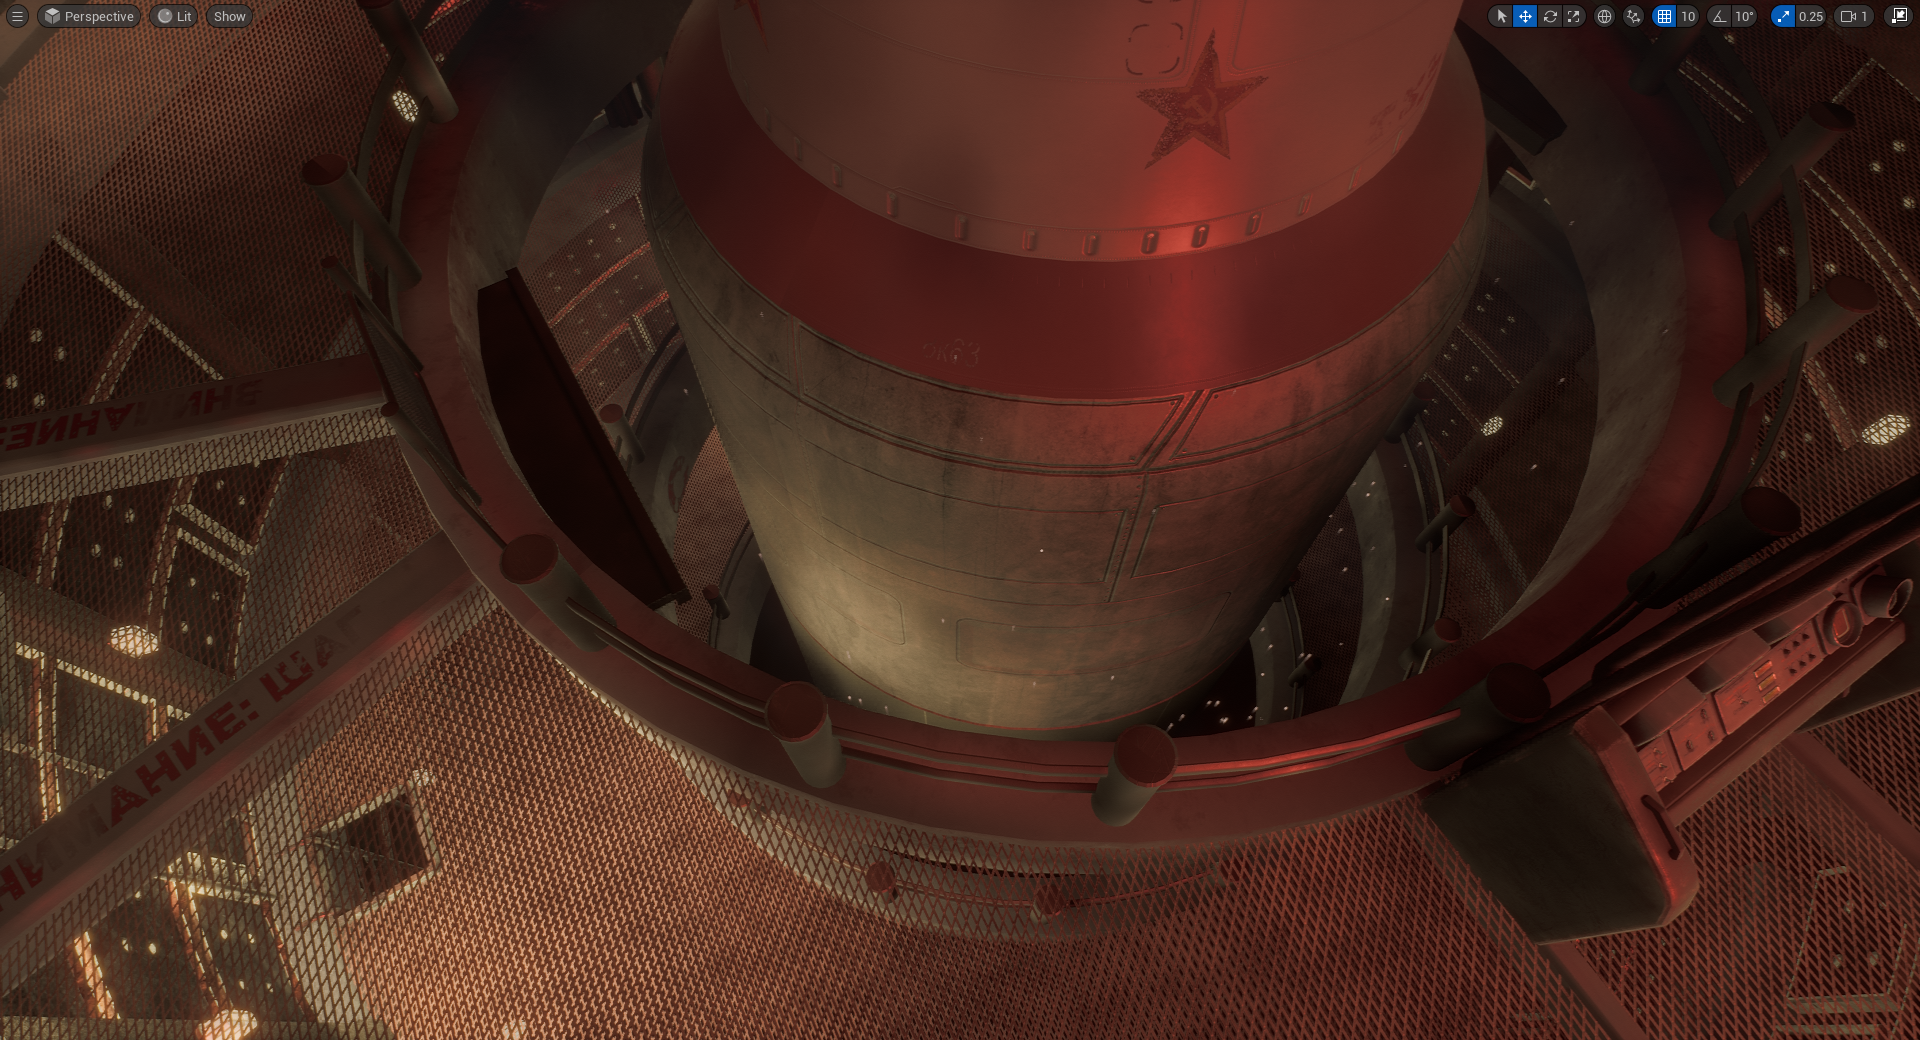
I wanted to use decals in a lot of places rather than bake into textures because doing so would give me a lot more control of the placement and I wouldn't have to worry about too much consistent unwrapping.

A key example would be the rocket, as it is a round object, there would be slight texture warping at the end where the seam is, I wouldn't want this to affect the overall look so doing decals to help bring out the rocket more would be the way to go.

Additionally, because the rocket would be a blank canvas, it would give the opportunity to reuse the asset for another faction or additional prop and transfer the decals around.

Most decals were made within Photoshop - however, other decals with more complex designs and ones that needed certain roughness and/or metallic values were made within substance painter in order to keep consistency within the scene.

Here is some examples of base colour decal that will hold opacity maps.

Decal examples


Sunday, December 18, 2022

Rocket trims

For the rocket centrepiece, I made several 2048 texture sheets in substance designer, I then unwrapped them accordingly in max, applying each subsection to certain selections on the model. I had red in mind for an overall scene look as I wanted it to represent 'danger' of some sort.
But going along with other materials, I looked at rocket reference, of which there were several metals, plastics etc on the rocket, so following this design principle I created these textures.

Rocket trims

Rocket model in max


Substance designer workflow

After getting used to substance designer this year, getting to make materials was pretty straight forward, I ensured I knew how to implement different values for different textures, like base colour and roughness.

In addition to this, I made sure that some of my textures used material IDs so I could easily interchange and identify parts of the texture and create opacity maps on blend.

These examples are 2048 wall textures, being part of the level architecture, it makes sense to put these as 2048 textures and make these the benchmarks.

Wall texture examples consisting of the base colour, normal and channel packed roughness metalness occlusion

Substance node sample


Props workflow

As discussed in previous posts, my aim was to get high detail onto 2048 textures, considering all these props are on this texture sheet are quite small, it would be a bit difficult to get exact texel density, however, in the substance viewport, they look fine.

Overall, the UVs are packed quite well and modelled well too.

For my scene, this would probably class as my 'decorative piece'


Low Poly models

Texturing

UV sheet


Saturday, December 17, 2022

Model, UV and Texture sample

This blog update is to justify my use of texture economy.
As mentioned in a previous blog, I wanted to cap my texture size at 2048 for most things, however, for smaller objects and decals I would restrict myself to 1024 or 512 - This may affect the texel density slightly, however, it would be cheaper to run and make the level more optimised.
When modelling, I keep in mind my smoothing groups for objects, because a lot of the time, the smoothing group was incorrect, resulting in a noticeably low poly area.

Console generation with a small amount of tris


UV Unwrap


Console unwrapped on 1024 texture sheet

Wednesday, December 14, 2022

Max Blockout

This update post is to show my max scene and how it is constructed.

To fit in with the 'don't look down' theme, I will be duplicating this main layer to ensure I can fit the criteria of this theme. Furthermore, it will make the scene believable and look like an ICBM silo with the addition of this verticality will help ensure the piece fits in.


Sunday, December 11, 2022

Texturing examples

This year we were introduced to substance designer, it has been a very useful tool to implement during this project.

My examples are a rubber texture and a floor grate (With opacity) made within designer.

Following along with what I learned at university, I channel pack my textures into an RGBA Merge.

I also went ahead and started texturing props within substance painter.

To keep consistency between textures, I ensured to keep the same hex codes for different colours, such as: Green and Grey, so I could get the right values from one scene to the next.

Furthermore, I adjusted my viewport in substance painter to the ACES LUT used in unreal engine to get accurate results in my texturing output.

Rubber texture in designer

Prop texturing in substance painter

Grate texturing in designer

Door texturing in substance painter

Node workflow example (consisting of tile sampler to generate grate patterns)